
Create an event
The three-step Create Event wizard explained field by field – information, payment & ticket, permissions & visibility – plus what happens right after you save.
From Home → Events tab, click Create Event. The wizard has three steps; you can go back with < Previous Page at any time and nothing is saved until you click Save on step 3.
Step 1: Event Information#
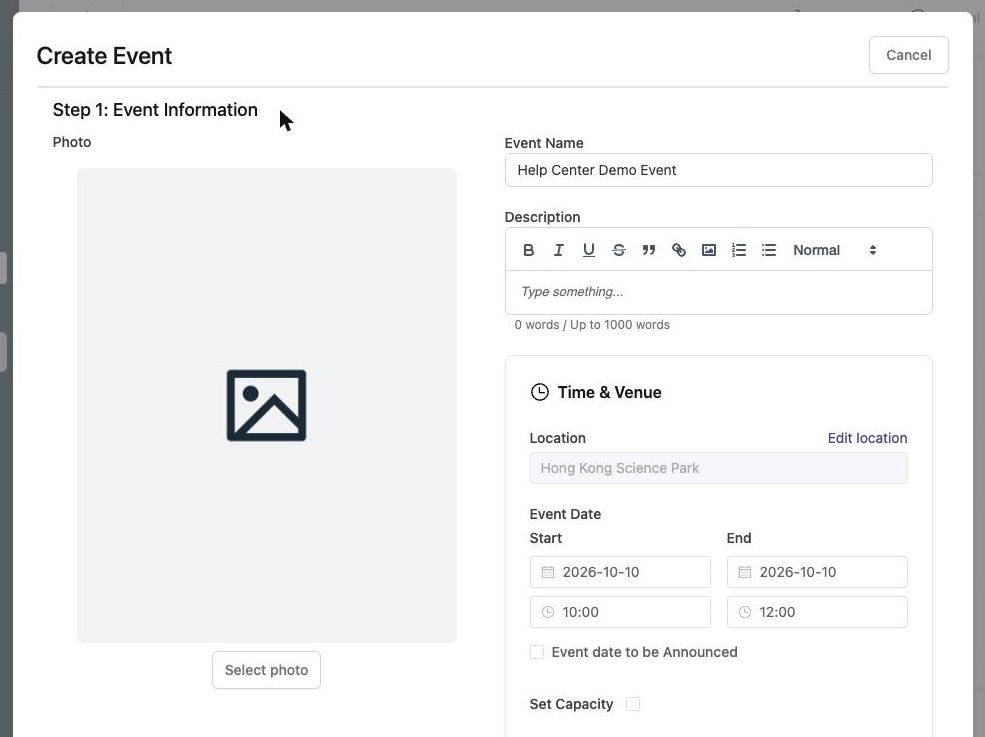
| Field | Notes |
|---|---|
| Photo | Your poster. Use a 4:5 image (Instagram post size, e.g. 1080 × 1350 px). Other sizes are accepted but may be cropped in listings. Click the bin icon to remove it. |
| Event Name | Required. Shown on the event card, the event page, e-mails and WhatsApp messages. |
| Description | Up to 1000 words. The toolbar gives you bold / italic / underline / strikethrough, quotes, links, inline images, numbered and bulleted lists and heading styles. Members see it in the Event details section of the event page. |
| Location | Click Edit location, type the Detailed Venue (address or venue name) – a Google Map preview appears – then Confirm. The address and a map are shown on the event page. |
| Event Date | Start and End date + time. If the end is earlier than the start you will be stopped with "Start time cannot be later than end time." |
| Event date to be Announced | Tick this if you do not have a date yet. The event page shows "To be Announced" and the date fields are disabled. See Dates, TBA and sign-up deadline. |
| Set Capacity | Tick and enter the maximum number of attendees. Untick for unlimited. The event page shows "15 spots" or "Unlimited spots". |
| Multiple sessions (and ticket types) | Leave Off for a normal event. Turn On only for multi-day / multi-track events sold as bundles – it cannot be switched off after saving. See Sessions and ticket types. |
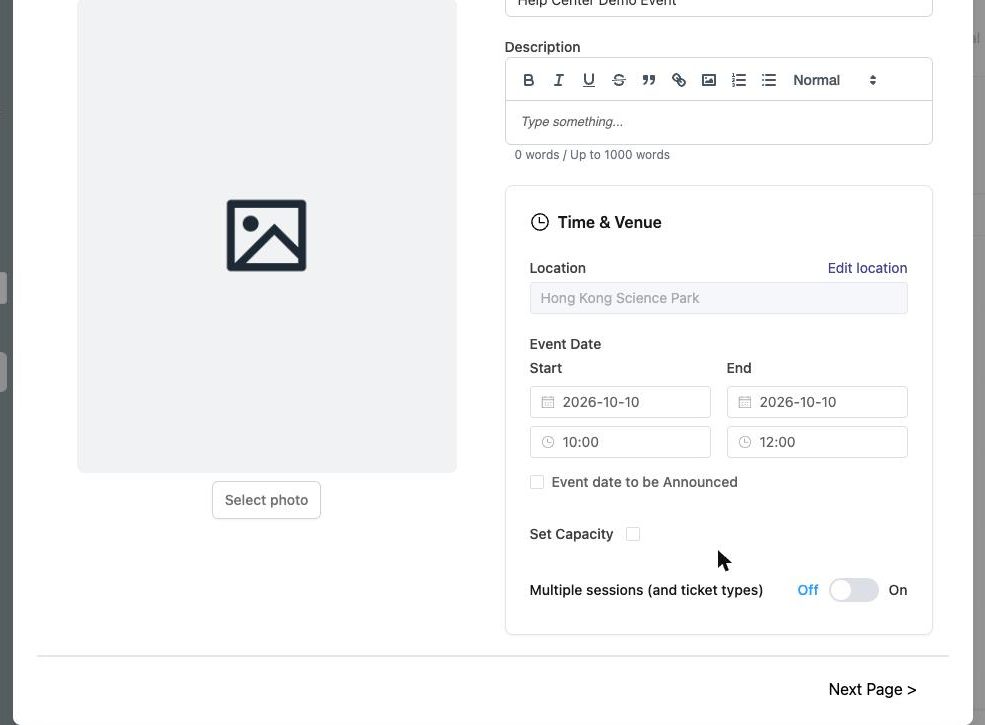
Click Next Page >.
Step 2: Payment & Ticket#
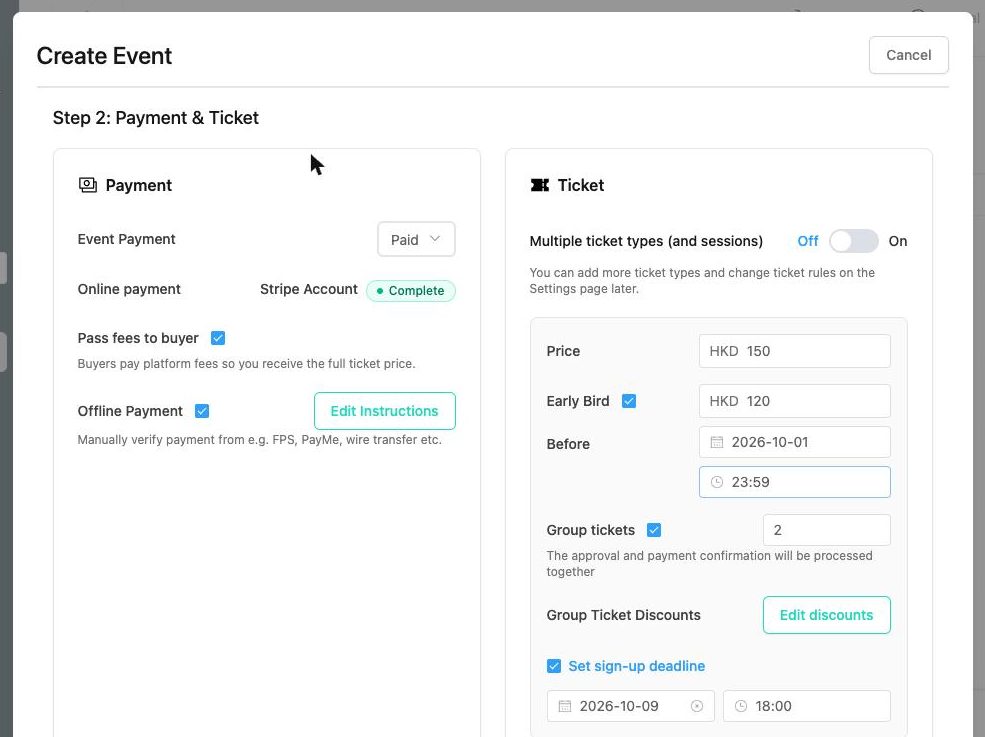
Payment card#
- Event Payment – Free ("Free join") or Paid ("Enable ticket sales + approval"). This choice is locked after the event is created – to change it later you must create a new event.
- Online payment – shows your organization's Stripe Account status (Complete, Partially Complete, Incomplete). Card, Apple Pay and Google Pay checkout only works when Stripe is connected. Set up Stripe →
- Pass fees to buyer (appears when Stripe is connected) – tick to add the ticket fee (5% + HKD 2.35) on top of your ticket price at checkout, so you receive the full ticket price. Fees explained →
- Offline Payment – tick to let members pay by FPS, PayMe, bank transfer etc. and upload a screenshot as proof. Click Edit Instructions and write what they should do (up to 1000 words). Offline payments →
Ticket card#
- Multiple ticket types (and sessions) – the same switch as in step 1 (they are linked). Leave Off for one ticket type.
- Price – in HKD. Paid events must have a price ("Pricing cannot be empty when collect payment is on").
- Early Bird – tick to add a lower price that applies until the Before date and time. Must be between HKD 10.00 and 100,000.00 and not above the base price; the deadline must be before the event starts. Early bird →
- Group tickets – tick to let one person buy several seats in one sign-up, and set the maximum tickets per person (at least 2, not more than the capacity). Approval and payment for the whole group are processed together. Group tickets →
- Group Ticket Discounts – Add discounts to set rules such as 2 or more → HKD 130 each. Available once Group tickets is ticked and a valid price is set.
- Set sign-up deadline – tick and pick the date/time after which the event stops accepting sign-ups. It cannot be later than the event start.
The line "Platform fee of 5% + HKD 2.35 added at checkout." under the card is a reminder of what buyers will see when Pass fees to buyer is on.
Click Next Page >.
Step 3: Permissions & Visibility#
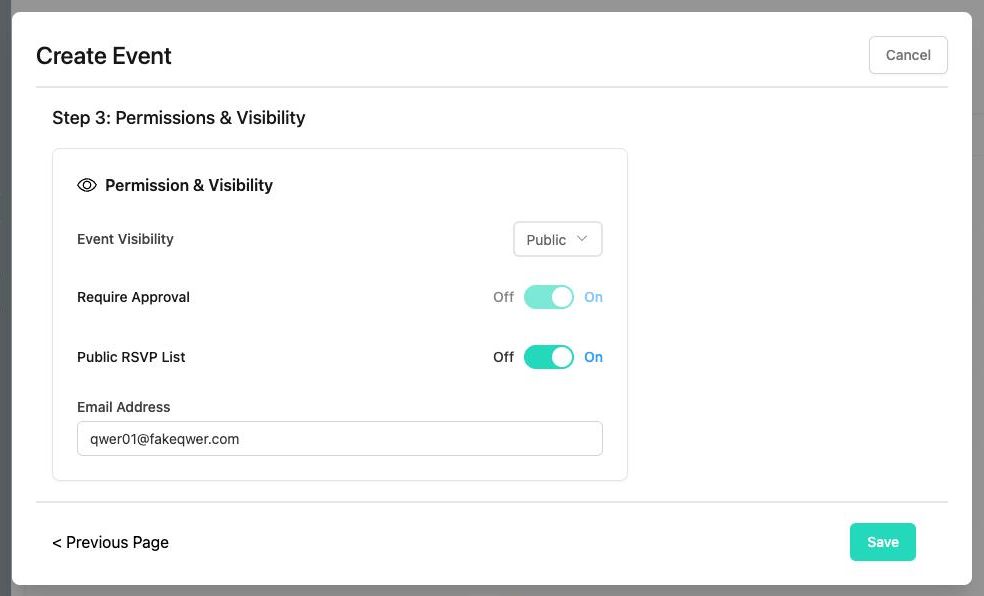
- Event Visibility – Public ("Event can be found on Explore Page") or Private ("Invitation members via Invitation Link"). Private events are reachable only by people who have the link. Details →
- Require Approval – On means every sign-up starts as Pending until you approve it. For paid events this is always On (hover: "You must allow approval to collect payment").
- Public RSVP List – On shows who is going on the event page. Off shows "Hidden by the organizer".
- Email Address – the contact e-mail displayed on the event page (pre-filled with yours).
Click Save. You will see "Event creation successful." and land on the new event's dashboard.
Right after saving#
- Information tab – copy the Invitation Link / open Event page to preview; copy the Payment Page Link for people who need to pay or upload proof later. Links explained →
- Setting tab – add a sign-up form, promo codes and extra event admins. If you enabled multiple sessions, create your sessions and ticket types now – until you do, the dashboard shows a banner and members cannot join.
- Public events appear on the Explore page and in the organization's profile automatically.
Was this article helpful?Thanks for the feedback! Still stuck? Email us.