
Approve and manage sign-ups
Read the Member tab, approve or decline requests, handle capacity and group seats, reassign sessions, and keep internal notes on members.
Open an event → Member tab. The header shows Capacity: approved / total and the number of members; the icons switch between grid (cards) and list; Manage opens the tools drawer (add/remove, check-in records, invitations, export).
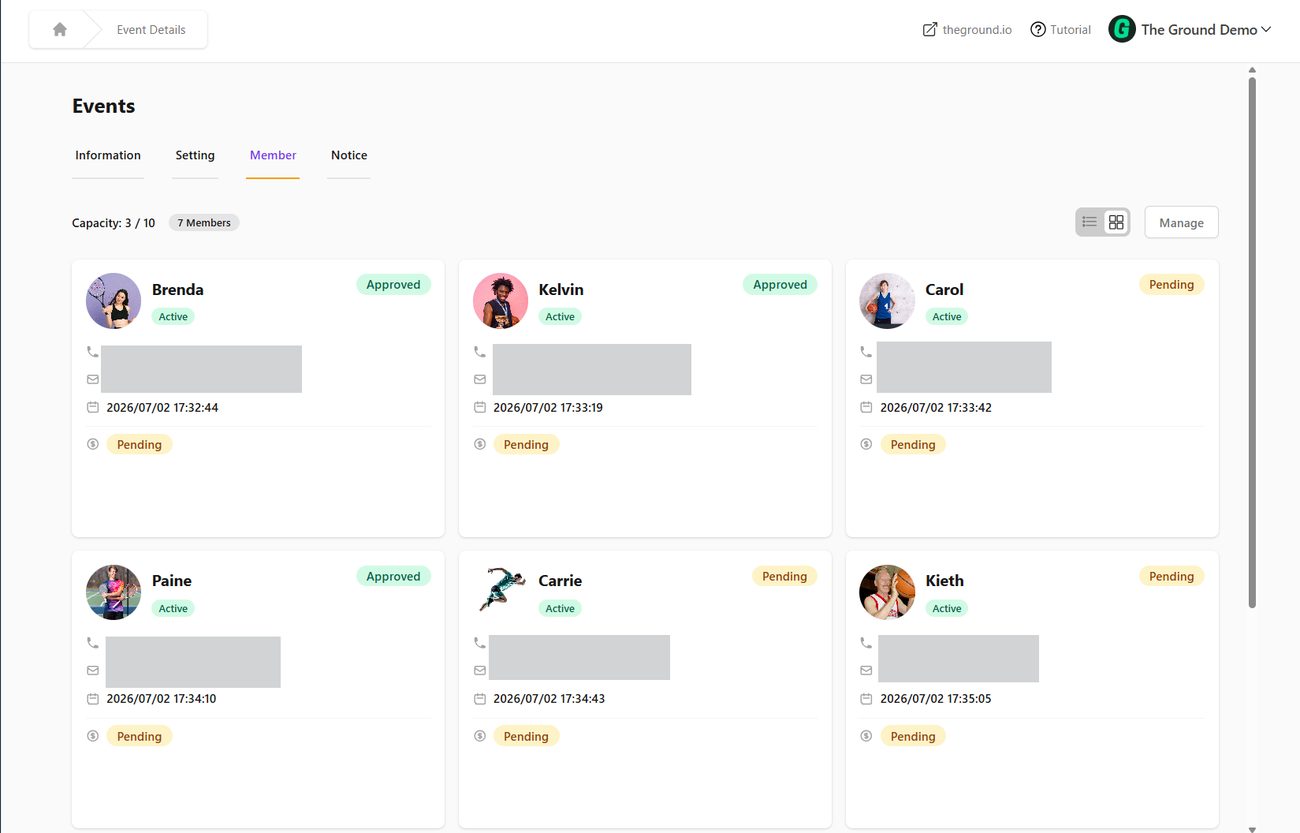
Each card shows the member's name and avatar, Active status, phone and e-mail, the join time, the payment chip and the approval chip (Approved / Pending / Declined).
Approve or decline#
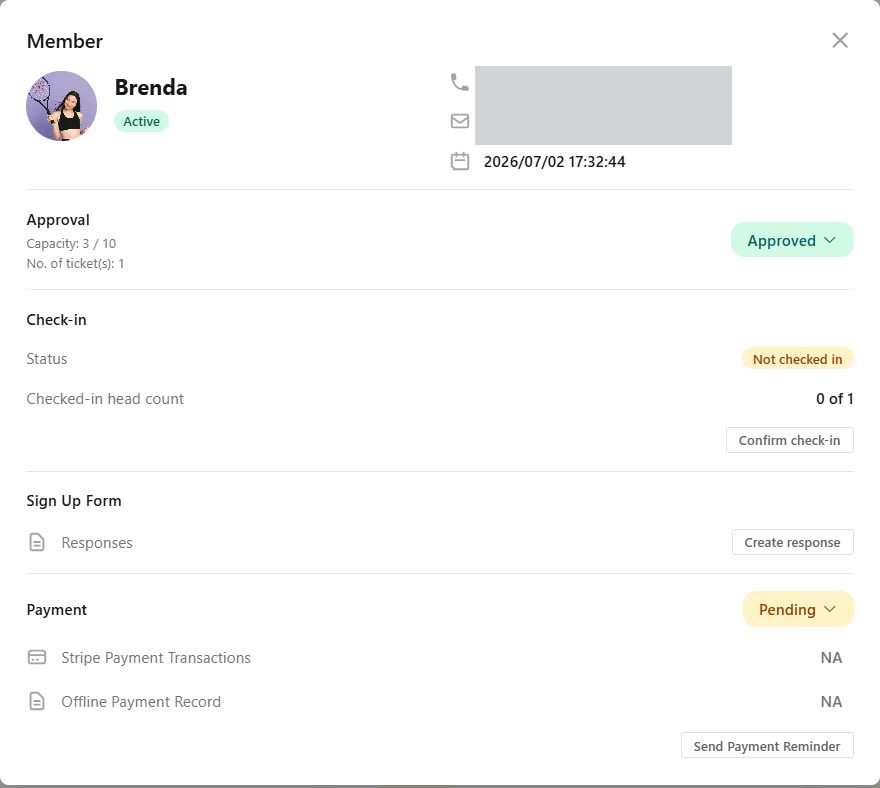
- Click a member's card.
- Under Approval you see Capacity: 3 / 10 and No. of ticket(s). Open the dropdown and choose Approved, Pending or Declined.
- Confirm "Do you want to update the approval status to …?". The member is notified.
- Events with Require Approval off approve everyone automatically.
- Paid events: approving confirms the seat; payment is tracked separately – see Track and manage payments. Common practice: approve when payment is Paid (Stripe) or after you verified the offline proof.
- Capacity: approving beyond the limit shows "Event capacity exceeded." or asks "Ignore the seat limit and continue?" – you decide.
- Group tickets: one approval covers all the member's seats.
- Cancelled events cannot approve members.
Multi-session events#
The card also lists the member's ticket and Selected sessions. Use Reassign sessions to move them ("Select 1 to N live sessions for this member" – hidden sessions cannot be assigned). Approving into a full session warns "Session capacity exceeded.". See Sessions and ticket types.
Sign-up form answers#
Under Sign Up Form click Responses to read the member's answers, or Create response / Fill the form for this member to enter answers on their behalf (e.g. for someone you added manually). Answers to an older form version are read-only – "The member answered an older version of the form. Answers cannot be edited." See Sign-up form.
Check-in#
The Check-in section shows Status (Checked in / Not checked in) and the Checked-in head count (for group tickets). Confirm check-in records arrival manually. Only approved members can be checked in. See Check-in.
Internal record#
Every member has an Internal Record visible only to admins: Role/Position, Number (jersey / bib number) and Remarks. Open it from the member's detail page (click their name) and click Save Changes. Use Remarks for things like "paid HKD 100 cash, HKD 50 outstanding" or "needs vegetarian meal".
Removing members#
Manage → Manual add/remove → Remove Members: tick the members and confirm. Removal deletes their sign-up for this event (they stay in your organization). For paid members, refund first if appropriate.
Keeping the list fresh#
The list updates live. If you see "Someone has just joined, please refresh to keep the list up-to-date" or "Session expired, please refresh", reload the page.
Export#
Manage → Export to CSV downloads all members with contact details, join time, approval and payment status – handy for a printed door list or your own CRM.